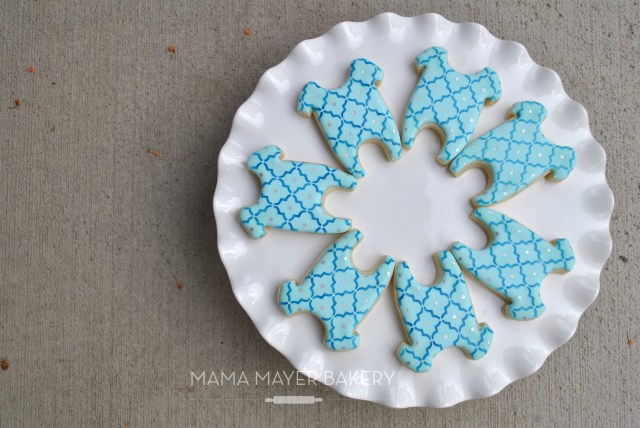
My niece is expecting her first child! Had to think of some pregnancy puns, pronto! It’s important to make light of an ever expanding situation, you know…

Here’s that cute onesie shape from Kaleida Cuts again! (yes, I am slightly obsessed…)


My niece is expecting her first child! Had to think of some pregnancy puns, pronto! It’s important to make light of an ever expanding situation, you know…
Here’s that cute onesie shape from Kaleida Cuts again! (yes, I am slightly obsessed…)
We’re about a month away from a big decision(s) here in the US of A. It feels like a lot of lines are being drawn. But this platter went to a party that didn’t take sides. Rather it celebrated our good fortune to be able vote on the matter.

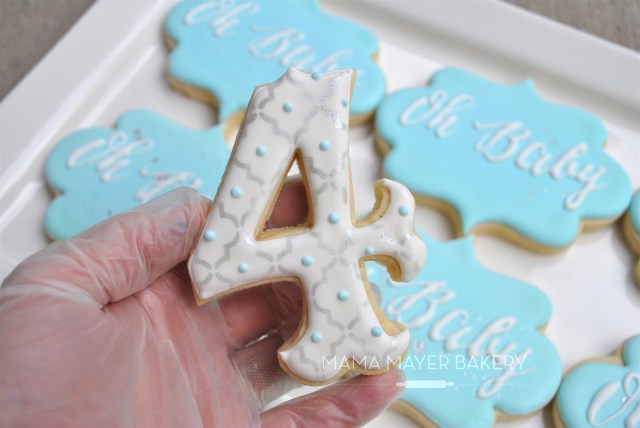
There are some people in life that you just HAVE to admire. These cookies are heading to a baby shower celebrating the coming of their FOURTH boy! Holy testosterone! (As you can tell, we have a mere two children. And I was pretty happy to have the energy for them….).

Blue and the number 4 were interwoven throughout the set. I added a little silver bling because everybody deserves a little bling (especially a mom of four!). The “4” cutter is part of the zebrawood cutter set from SheyB ! They have such fast and friendly service!

This little outfit cutter is my current favorite. Can’t get over how adorable it is. Thank you Kaleida Cuts (so many designs to take advantage of!)!!! The clever technique is from the genius Tammy Holmes. Utterly brilliant design. Utterly delicious eye candy.
Every boy in this family has a name that begins with the letter “C.” The fourth will as well. And heaven forbid that I not take advantage of a chance to word play. I knew love was in the foreseeable future…

Ryan wanted her birthday to be centered around jack rabbits. I did a cookie take on the invitation artwork (sorry I can’t give the artist credit/wish I knew who her/his name!) and added a few embellishments…

I wanted a soft background with lattice work (those rabbits had me thinking of Mr. MacGregor’s fence but with something sweet for 5 year old girl …). Stencil hero Killer Zebras came through again with just the right touch.

After I flooded the cookie in pink and airbrushed gold sheen (Americolor), I put the base of white royal icing for the bunny (and the black eyes about 4 hours later). They dried overnight before I added the details with my trusty Rainbow Dust pens. Luckily I had some purple flowers I had made with leftover icing from another cookie set; they worked perfectly to sync up with the invite design. And the result:

In MamaMayer’s garden…

So my amazing friend Lisa was fast approaching another birthday. How could I make her laugh and let her know that she is showing no signs of aging? By expressing my sentiments in cookie, of course.

This box of cookies was taken to a Croquet and Rose’ themed birthday by a party guest. Got to love a cute theme that rhymes! And what could go wrong at a party that mixes excessive amounts of wine with a large mallet and heavy, hard ball?

I may or may not have had to do some “research” about rose’ wine???????

I am so happy for Katherine- that she is graduating from high school and heading to Pitt to study neuroscience. But, dang, she is the youngest of the swim kids with whom our children hung out! All this growing up is happening! An era of chlorine is over (I mean, even Michael Phelps is retired now). Yikes!
In any case, it was one last graduation set to make. I made two platters: one focused on the nerdy inclinations and the other on her future university, Pitt.


For the Geek inside us all (okay, maybe not ALL of us), I focused on some biological responses. #nerdsrule #chemistryiseverywhere Those stamped clever/nerdy sayings came from pencils I bought from Newton and the Apple.

But my favorite was the Myelin sheath dress. (I try to come up with my own clever creations whenever possible. I think this is another Mama Mayer original.)

Lastly, here are a couple of close ups for the Pitt cookies. I have a thing for puffy cookies….


Um. Oil rigged, I mean. As in derrick oil rig. Old fashioned to remind this 80 year old birthday boy of his younger days, running his oil business.

The event planner’s instructions were specific: a large cookie (yep, that’s a 6″ long cookie) with the rig exactly as he had drawn (the planner is quite the artist himself) on a light blue background. Oh yes, and Mr. Johnson (the birthday boy) wanted green oil. (Not that I doubted him but I had to look that one up; it is true that in some places the crude comes out green!) The 6″ cookie cutter came from the ever.so.helpful Bobbi at Bobbi’s Cookie Cutters.

Step 1: Bake 150 of these HUGE cookies. Step 2: Flood and let dry over night. Step 3: Paint the background. Step 4: Hand draw (with Rainbow Dust double sided edible markers) the oil rigs. Step 5: Add green oil with second layer of icing. Did I mention they wanted 150 of them? (The photos only show 100 of them. The other 50 are on another table…)


Here is my friend, Judy and Ray, the event planner! Thanks for having confidence that I could bring your vision to cookie life!

The occasion was a jazz brunch for the ladies. A New Orleans vibe with all the ‘instrumentation’ of their music was requested. With a nod to the piano and the color theme of white, black, and mint, I stamped, stenciled and gold highlighted my way to these cookies.


2016 Fathers Day set #2. Although this set could be for anyone who has been supportive! These particular cookies were for a guy that LOVES his breakfasts. Has been known to have breakfast for dinner or snacks some days. And, perhaps more notably, he is the MOST wonderful dad (okay, truth in lending, my hubby is the inspiration for these). He has been so supportive of our two girls and has doled out some hysterical and on point advice…unlike their mother, he gives it only when asked!). We are incredibly fortunate!

To make the waffle, I started with a square cookie and iced a square grid as shown below. While I let the grid dry, I made the egg, butter pat, and bacon on a separate piece of acetate (or use parchment paper) and let that sit overnight. Next, I thinned down a small batch of ivory tinted royal icing to a very runny consistency and poured that over the square cookie, letting excess run off. As that set up, I made the ‘syrup’ icing and peeled off the egg, etc transfers. I painted on some dimension to the small squares within the waffle and let that dry. Then I semi-poured, semi-helped (with a paint brush) the syrup icing to flow where i wanted it. Added the transfers and stamped the words. Quite happy with how the waffle turned out. The bacon needs work.


